| You are here : : Home > Free Resources > CorelDraw Tutorials > Awesome Abstract Illustration |
In this tutorial you will learn how to create a Colorful Abstract Female Illustration in Corel Draw using the Bezier & Shape tool. You can also download the free source .cdr file for this awesome abstract illustration.
Tutorial Details
- Program: CorelDraw 11 - X5
- Difficulty: All
- Estimated Completion Time: 30 Minutes
Tutorial Assets
The following assets were used during the production of this tutorial.Step 1 : Basic Elements
First of all you have to use CorelDraw with version 11+. In this tutorial I use CorelDraw X5, Okay lets get started. Let’s take a look at the basic elements used to create our design :
This also will be our steps to create the design.
Step 2 : Creating Worksheet
Okay, now that you know the steps and elements, we will begin, first of all open your CorelDraw program, now create a new file and set the paper size to A4 and set the Units to Centimeters.
Step 3 : Working with Bezier & Shape Tool
Now that we have our worksheet set, now we will begin to create the Upper Illustration, first go to the " Bezier Tool ", you can found it on the left toolbar, make a Simple custom line similar to picture below.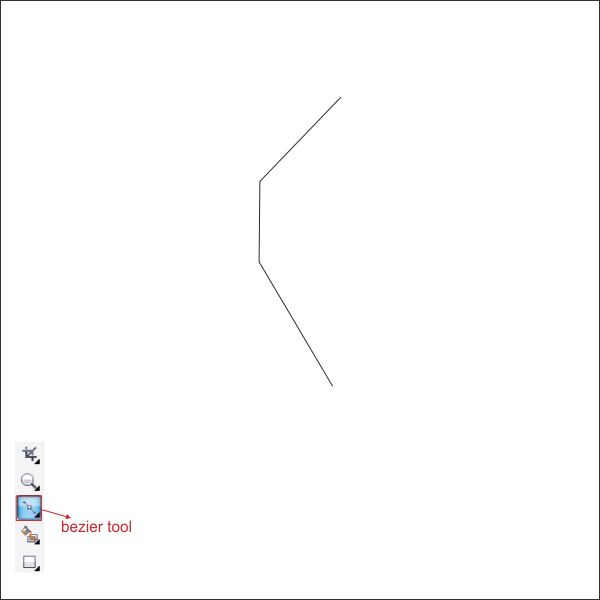
After that Right click on the upper line and find " Convert to curves ", now you will see an arrow on the corner, click and drag it using " Shape Tool " to curve the line.

Now using the same steps as above, apply it to all the lines.

Go to the upper toolbar and find the " Line Options ", change the line width into 8 pts to make it thicker.

After that go to the upper toolbar and find Arrange > Convert Outline to object, this will convert the line into object so we can customize it.

Step 4 : Creating the Upper Illustration
Now using same steps as above, create a second line similar to the first one.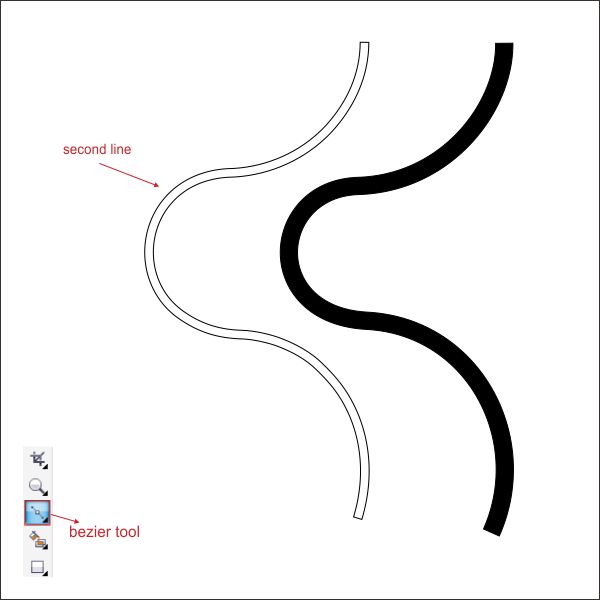
Arrange it on the bottom layers of the first one, by pressing " Ctrl + PageDown "

After that using same steps as above, create a third line similar to below.

Okay now that you got the flow, create fourth line similar like below, you can add more lines as many as you like using same steps as above, but make sure that the lines is on the same flow as the first one.

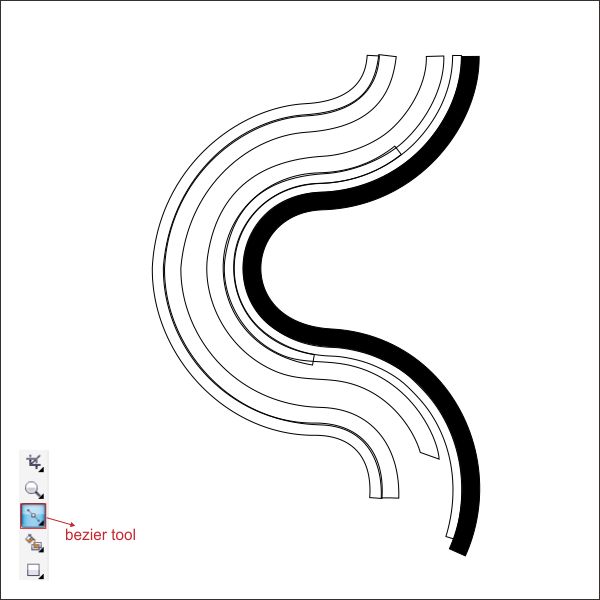
Step 5 : Coloring Tool
Okay now lets put color on the lines, select the first line and go to the " Fountain Fill Tool " in the left bottom toolbar and apply the value below.
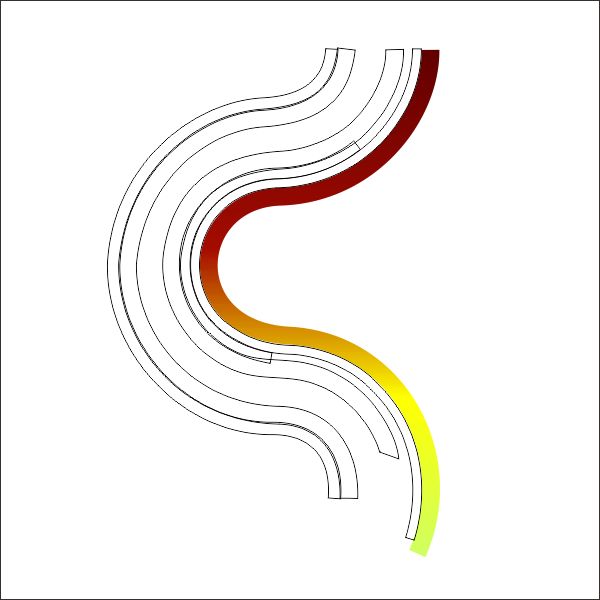
Now select the second line, and go to the " Fountain Fill Tool " and apply the value below.
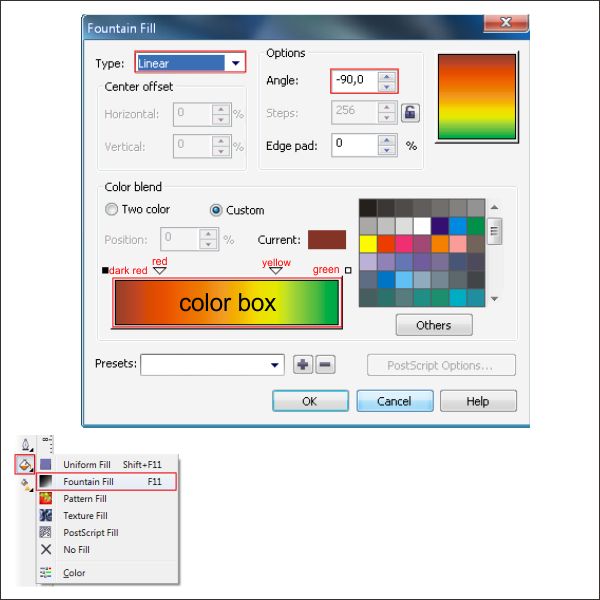

Using the same steps as above, put color on all the lines, you can mix any color that you like, but in this tutorial i use Red, Yellow, and Green.

Okay now we are going to create more lines to the upper Illustration, using same steps as step 3, create a custom shape line similar like below.
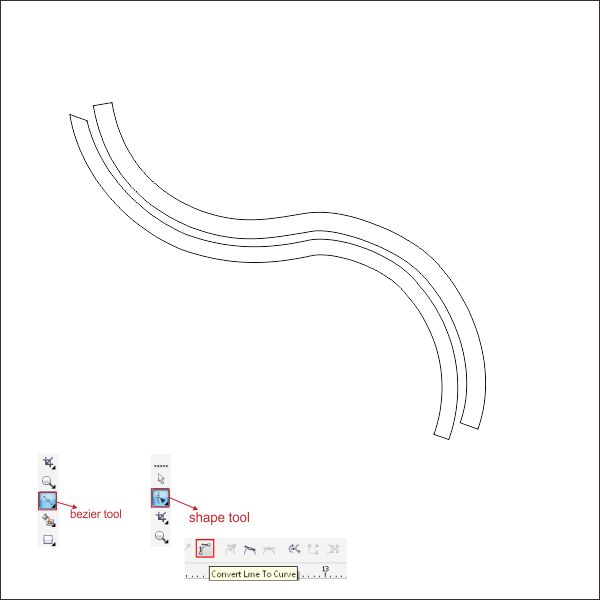
Add more custom line to the original one similar like below.

You can add more custom lines as many as you like, but remember you must follow the shape of the original.

Okay now lets put color on the lines by go to the " Fountain Fill Tool " and apply the value below, in this case i use red combination but you can add color that you like.
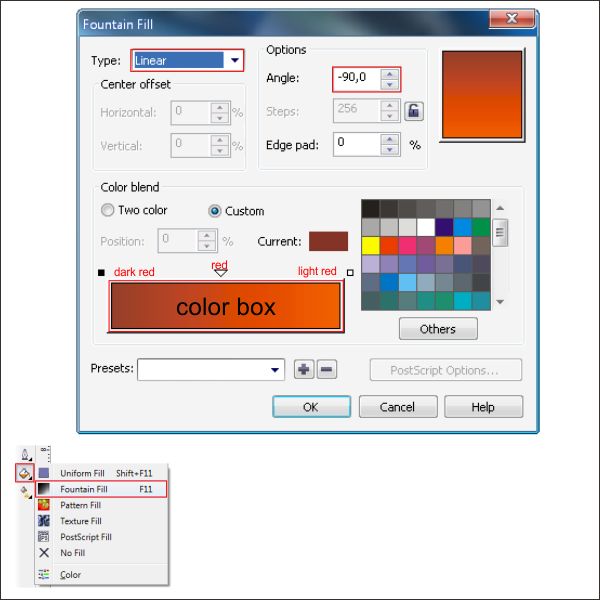

Now select all the lines and group it by pressing " Ctrl + G ", arrange it on the bottom layers of the first custom lines that we already created.

Now using same steps as step 3, create a third custom lines similar like below.

Copy and add more lines as many as you like, to make it more vibrant.
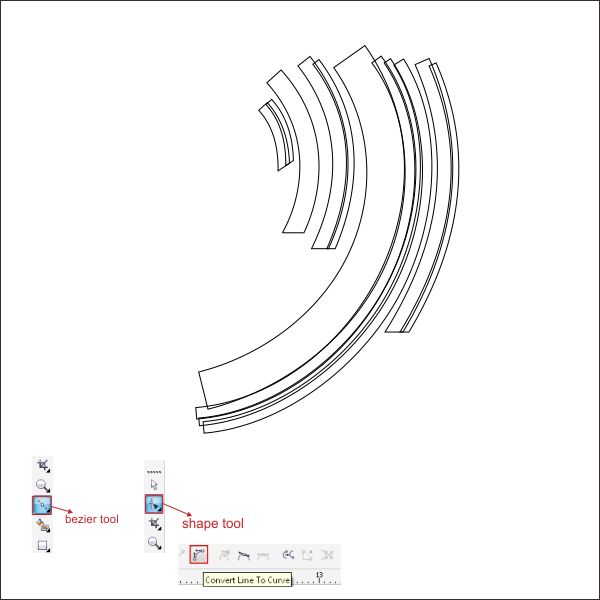
Now select all the lines and put color in it by go to the " Fountain Fill Tool " and apply the value below.


Group it by selecting the objects and press " Ctrl + G ", after that arrange it on the right side of the previously created custom lines.
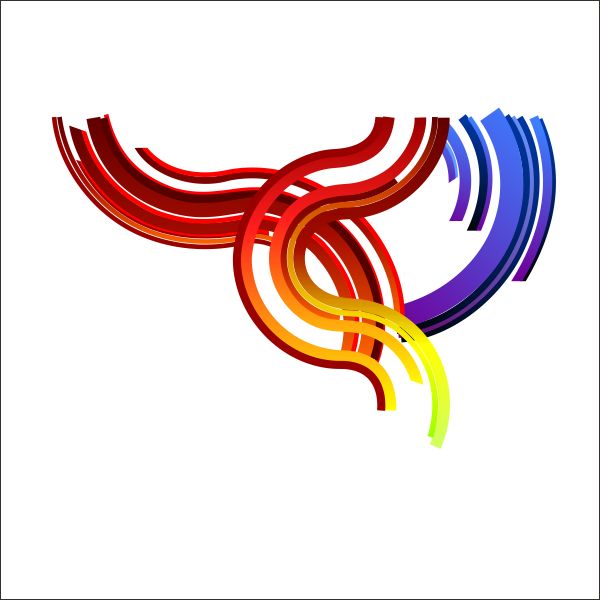
After that copy the third custom lines, by pressing " Left + Right Mouse " and arrange it to the center.

Put a different color on the copied custom line, you can add any color that you like, in this case i use Red, Yellow and Green combination.

Okay now that you have got the idea, add more custom lines by copying the existing custom lines similar like below, you can make as random as you like because we have create the main shape.


After you copied and add more custom lines similar like above, select all the lines and group it by pressing " Ctrl + G ", after that flip & copy it by pressing " Left + Right mouse " while dragging it to the bottom.

Step 6 : Creating Female Face
Go to the " Bezier Tool " and create a custom shape similar like below, point and click to create the shape, make sure the last click is connected to the first click or else you cannot put color in it.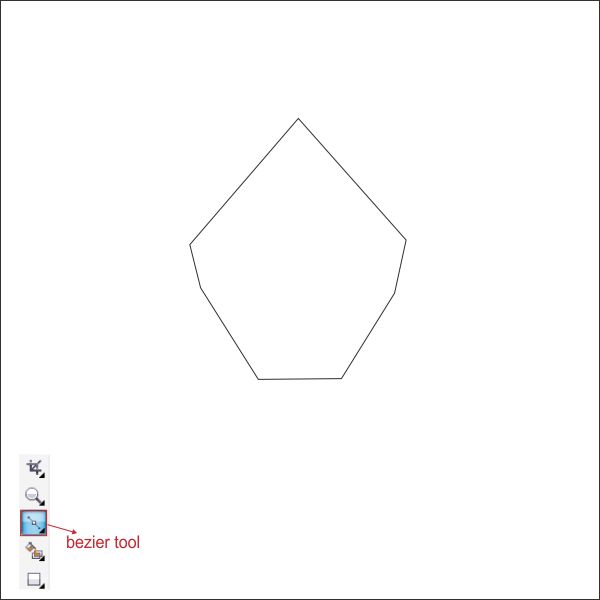
Using the same step as steps 3 shape it using " Shape Tool " similar like below.

Put color in it by go to the " Fountain Fill Tool " and apply the value below.
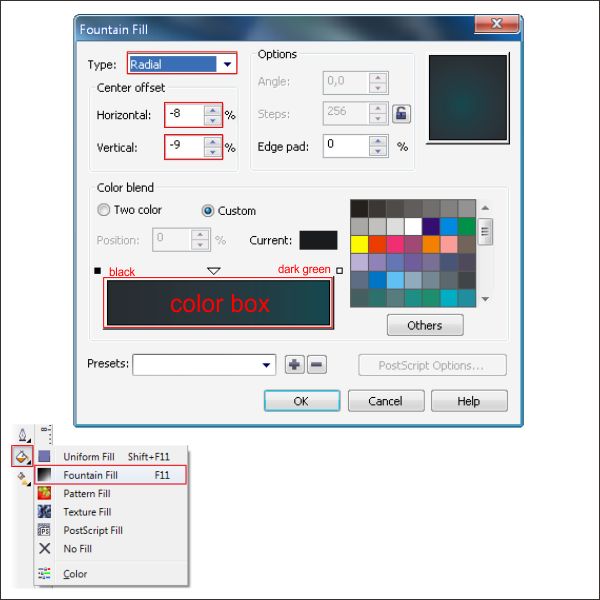

Select the object and arrange it on the center of the Illustration.

Now we are going to create the Female Lips, go to the bezier tool and create a custom triangle shape similar like below.

Using " Shape Tool " shape it similar like below, so it will shape llike the bottom lips.

Put color in it by go to the " Fountain Fill Tool " and apply the value below.


Now select the lips and copy it, make sure that the copied lips is smaller than the original.
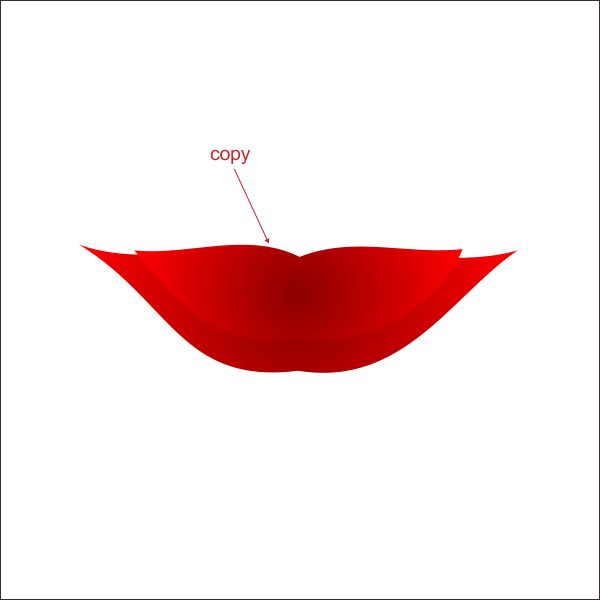
Now we are going to create the upper lips, go to the " Bezier Tool " and create a custom triangle shape similar like below.

Shape it using " Shape Tool " untill it looks like an upper lips.

Put a Dark Red color and create a copy of the upper lips.

Now select the copied upper lips and put color in it by go to the " Fountain Fill Tool ", and apply the value below.


After that select the copied upper lips and in the top toolbar find Arrange > Powerclip now your cursor are turning into a black arrow, click it to the original upper lips.
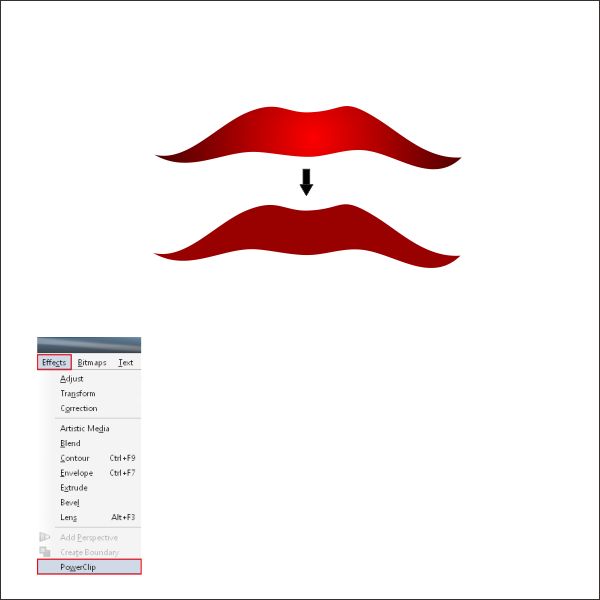

Now arrange it on top of the bottom lips.

After that select all the object and group it by pressing " Ctrl + G " and arrange it on the Female Face.
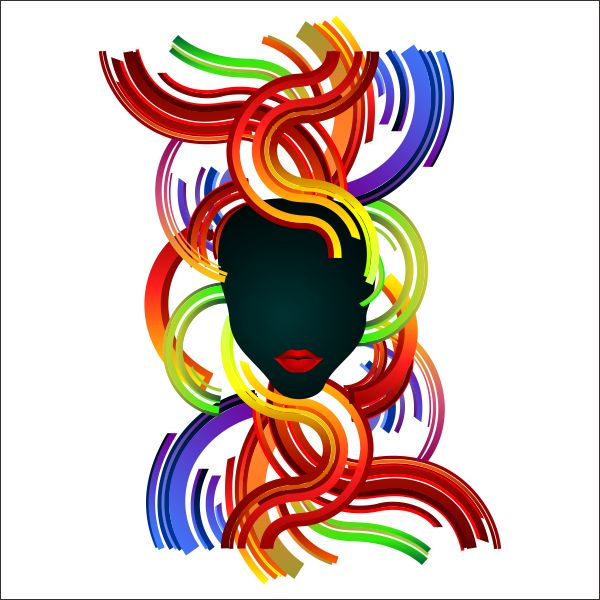
Okay now we are going to make the Glasses, go to the " Bezier Tool " and create a custom shape similar like below.

Shape it using " Shape Tool " untill it similar like a sunglasses.

Put a pink color in it.

Copy the pink glasses and put a white color on the copied one.

Now select the copied glasses and go to the " Interactive Transparency Tool " in the left toolbar and apply the value below.

Select all the object and group it by pressing " Ctrl + G " after that arrange it on the Female face.

Put Black color on the worksheet background to make it more visible.


 7:05 PM
 Unknown


 Posted in:
0 comments:
Post a Comment