
Tutorial Details
- Program: CorelDraw 11 - X5
- Difficulty: All
- Estimated Completion Time: 45 Minutes
Tutorial Assets
The following assets were used during the production of this tutorial.Step 1 : Basic Elements
First of all you have to use CorelDraw with version 11+. In this tutorial I use CorelDraw X5, Okay lets get started. Let’s take a look at the basic elements used to create our design :
This also will be our steps to create the design.
Step 2 : Creating Worksheet
Okay, now that you know the steps and elements, we will begin, first of all open your CorelDraw program, now create a new file and set the paper size to Custom, set the Units to Centimeters and resize it to 3.508 x 2.480 px.
Step 3 : Creating Web Header
Now that we have our worksheet set, now we will begin to create the Web Header, go to the " Rectangle Tool " and create a box shape with the size of 1.860 x 615 px.
After that go to the left toolbar and find " Shape Tool ", click on the corner of the box and drag it, that will make the corner rounded.

Now go to the " Shape Tool ", double click on the bottom middle line to create a custom node / corners.

Now drag the nodes to create a similar shape like below.

After that go to the upper toolbar and find " Convert to curves ", click and drag the arrow on the corner to shape like below.
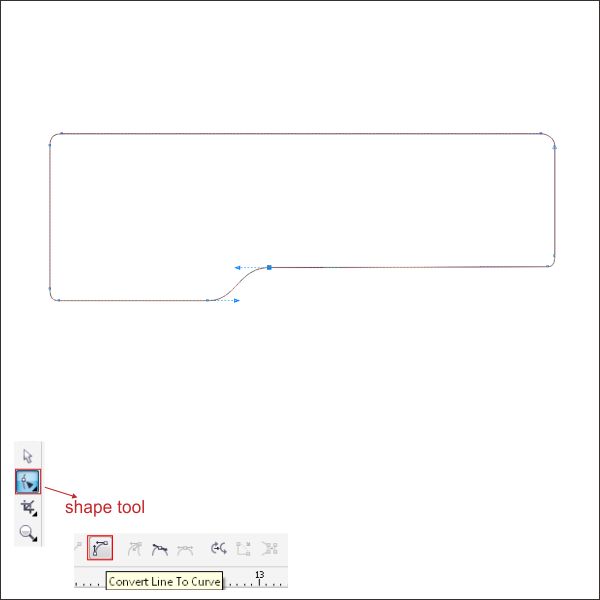
Lets put color on the object, go to the " Fountain Fill Tool " and apply the value below.


Step 4 : Creating the Web Header Flow Elements
Go to the " Rectangle Tool " and create a custom box shape similar like below.
After that using same steps as above, shape it with " Shape Tool ".
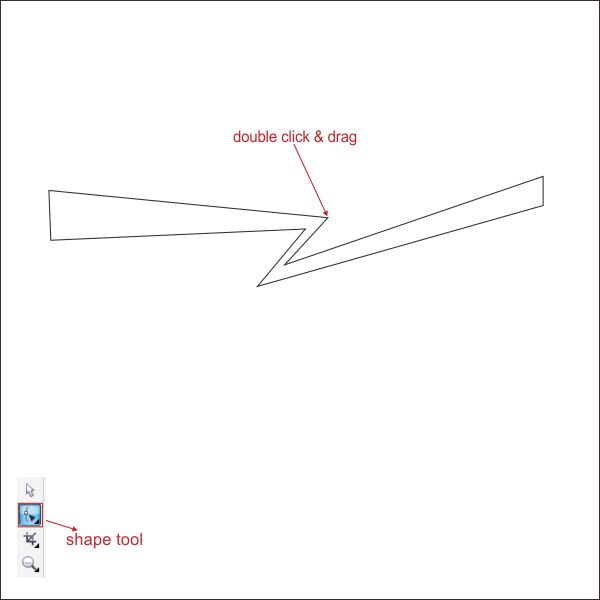
Now shape it using " Shape Tool " and " Convert to Curves " similar like below.
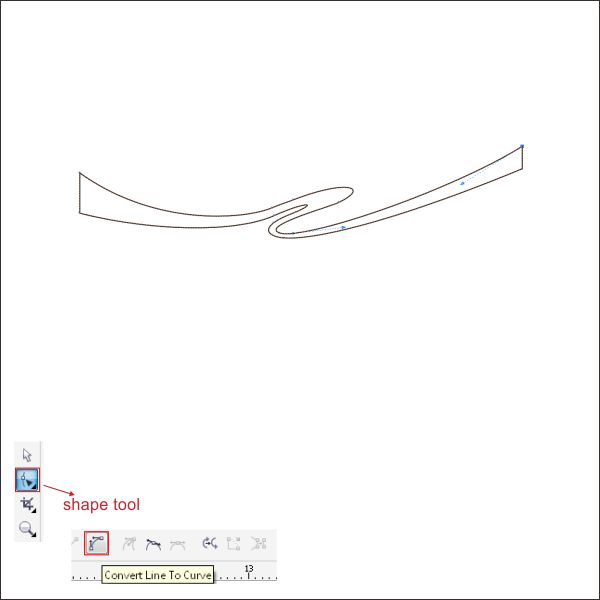
Lets add more elements, go to the " Bezier Tool " and create a custom triangle shape similar like below.

Using same steps as above, shape it using " Shape Tool ".


You can add more elements using same steps as above, similar like below.

Okay lets pur color in it, select the main shape and go to the " Fountain Fill Tool " and apply the value below.


Now select the rest of the elements and put color in it.


Using same steps as above add more elements to the yellow shape.

Step 5 : Creating the Web Header Exploding Elements
Okay now go to the " Bezier Tool " and create a custom triangle shape similar like below.
After that shape it using " Shape Tool " untill it looks like a leaf.

Copy the shape using " Left + Right " mouse click while holding Ctrl, make the copied shape smaller.

We are going to trim the shape, select both of the leaf shape and go to the upper toolbar, there you will see a " Trim Tool " press it in order to trim the object.

Put any color that you like, in this case i use a gradient of Purple and Dark Purple.

Okay now using same steps as above create another two custom leaf shape similar like below.

Arrange the position of the three shape untill it looks like an exploding shape.

Copy and arrange it similar like below.


Okay now select all the objects and group it by pressing " Ctrl + G ", after that flip and copy it similar like below.

Step 6 : Working with Powerclip
Now arrange the exploding shape to the left side of the flow elements, and on top of the Web Header that we previously create.
After that select the Exploding elements and copy it, make sure the copied elements is bigger than the original, put Gray color in it.

Now we are going to insert the elements into the web header, select all the elements and go to the upper toolbar and find Effects > Powerclip, now you see that the cursor are turning into black arrow, click it into the web header.


Now that you have already know how to work with " Rectangle Tool " and " Shape Tool ", create a search box on top of the web header similar like below.


Also create a navigation box on the bottom of the web header using same steps as above.


Step 7 : Creating Web Button
Lets create the Web Button, go to the left toolbar and find " Callout Shapes Tool " find a circle calout and drag it to your worksheet.
After that create a custom box shape on the right side of the callout shape using " Rectangle Tool ".

Make the corner rounded by click and drag it using " Shape Tool ".

Put any color that you like, in this case i use Pink and Purple gradient.

Lets make a shiny effect to the button, go to the " Ellipse tool " and create a custom ellipse tool similar like below.

Go to the " Interactive Transparency Tool ", hold and drag from top corner to the middle to create similar transparency as below.

Now copy the button as much as you like and arrange it on the bottom of the web header.

Using " Callout Shape Tool " create a similar callout as above and arrange it on the right side of the button.


Step 8 : Creating Web Frame
Lets create the Web Frame, create a custom box shape using " Rectangle Tool " and resize it to 2.460 x 1.830 px.
Go to the " Fountain Fill Tool " and put a color in it by applying the value below.


Create a second box shape using " Rectangle Tool " and resized it into 1.892 x 1.355 px.

Now that you have already know how to shape with " Shape Tool ", shape the frame similar like below.

Okay now lets put it all together select all the objects and elements, and put it on top of the purple background.

After that create another custom box shape using " Rectangle Tool " and resized it into 1.933 x 1.477 px.

Shape it using " Shape Tool " similar as below.

Arrange it on the bottom layer of the elements using " Shift + PageDown ".

After that select the last frame and go to the " Interactive Transparency Tool ", set the transparency into Uniform.

Now lets put a texture on the last frame that we created, copy the exploding elements, put white color and arrange it to the bottom of the elements.

Make it transparent using " Interactive Transparency Tool " by applying the value below.

After that place the exploding elements inside the Last frame using " PowerClip " same as steps 6.
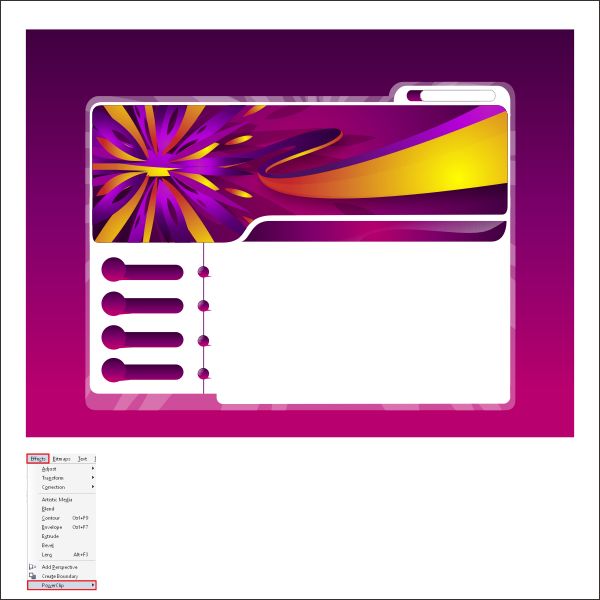
Okay now lets make the background more exciting, copy the Flow elements and arrange it as below.

Place it inside the background using " PowerClip " same as steps 6.


 7:10 PM
 Unknown

 Posted in:
0 comments:
Post a Comment